
Loving Tan!
/ As Spring is hopefully just around the corner here in Sydney it's time to prep!
I haven't used any self tan in a while mainly because of the maintenance, that I don't want to commit to in my already busy schedule.
And its never a good idea to apply self tan when in a hurry.
Now that I have received a whole bag of tanning goodies from a new self tan brand Loving Tan, I might change my mind!
As Spring is hopefully just around the corner here in Sydney it's time to prep!
I haven't used any self tan in a while mainly because of the maintenance, that I don't want to commit to in my already busy schedule.
And its never a good idea to apply self tan when in a hurry.
Now that I have received a whole bag of tanning goodies from a new self tan brand Loving Tan, I might change my mind!
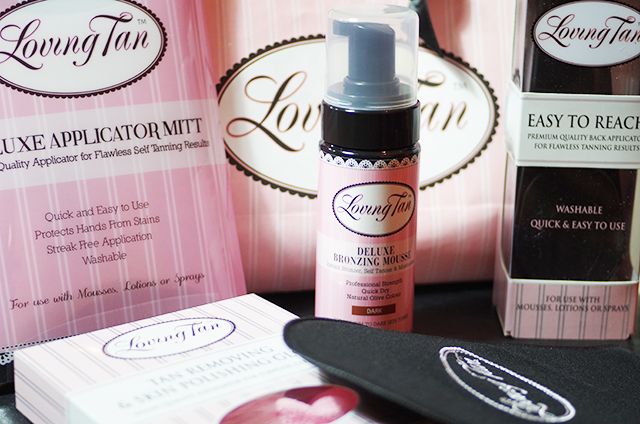
Not only is their product in my favourite form, it also comes with a whole set of cute and super useful tools to make the process easy instead of messy. I have always been a fan of tanning mousse! Unlike sprays that just mess up your whole bathroom, mousse just gets directly where you want it: On your skin! Loving Tan claims to be the first professional strength self tan that you can buy and use at home and it comes in 3 different shades: Medium, Dark & Extra Dark. I think it's always best to stay as close to your natural colouring as possible, and I personally prefer only a very light tan. That's why I don't really care for the professional strength part. I got send the Dark shade, which scared me bit so I decided to use it on my legs first, the indicator colour comes our really dark, so I wouldn't personally wear it as a instant tan. Using the provided Mitt, which looks really nice in it's all black embroidered design. The product went all very easily, i was seriously impressed with the texture. I applied it in the evening and left it on for the throughout the rest of the night, washing it off before bed, as I didn't want the tan to be too dark. I left it on for 6hours instead of the recommended 8h, just because I used the dark colour, although I would have preferred medium. And I have to say it looks VERY natural, a nice olive tone. As my skin is naturally a little dry I will need to moisturize with an oil free moisturizer to keep my skin hydrated. The colour of this is exceptionally natural. My legs are spring ready!

What I love about this product:
It comes with great instructions, tips & tricks Loving Tan has useful tools & accessories like a mitt, a back applicator and an tan removing glove, all of which were super helpful! The texture, feel & smell of the product are great The colour is natural It has Aloe Vera and other lovely naturally soothing and hydrating ingredients
What is worth thinking about:
Not everyone looks better tanned! Also be aware of tanning before your wedding day, as a tan can look less classic and not always nice against the white dress, unless it's your natural skin colour. You might regret this in your photos later! When tanning your face also be aware it doesn't always photograph well. Stay close to your natural colour Embrace your natural skin tone, the fairest skin is just as beautiful as the darkest skin Always make sure you have enough time (about 15min) to apply your tan carefully, if you rush you might regret it later, when looking patchy! Start with a lighter colour if you are new to tanning as little mistakes will be more forgiving. Definitely use a mitt, to avoid staining your hands.
Will I use this again? Definitely on my legs and possibly once the first hot days are coming! Does it have a self tan smell? The product itself smells really nice and fairly neutral. Unlike the cookie smell of many other brands. If a self tanning product works though the reaction will always create that self tan smell on the skin, no matter what the brand says! I have tried every single one of them, some are better some worse of course and I find that all the premium brands are definitely much less offensive. I found the key is to use it on a day off in the evening, when you don't need to leave house, wear your oldest pyjamas and wash it off before bed. That way you won't be left with that smell. Too Easy!
I hope you found this review helpful. All information is my honest opinion about the product. I was provided a sample for the review.